|
Furnaces are quite remarkable devices. Since prehistoric times, naked men have been building furnaces for melting all sorts of metal and metallic alloys. Through the ages, the design of the traditional coal/charcoal powered furnace has evolved only very slightly. This is the design to be built here in Penguin's Lab (but please, skip the naked part).
Of course, there are other more efficient, and perhaps more high tech furnace designs out there which utilize propane, oil, or even electricity. However, I decided to give the charcoal furnace a shot, given its remarkably simple design and effectiveness.
|
Pouring molten aluminium into ingots (details below)
|
|

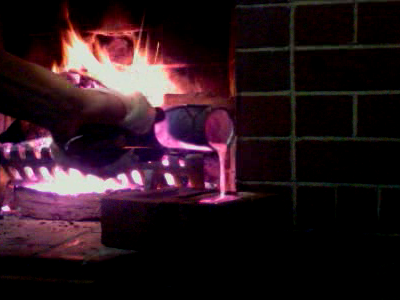
Melting an aluminium heatsink in a regular fireplace
|
At first, I did not believe that aluminium was an easy metal to melt. So I devised a very simple strategy to see whether or not there was still any hope of smelting aluminium...
The (ultra crude) strategy was to dump an aluminium heatsink in a ceramic cup and leave it in a fireplace overnight on top of hot coals.
I must here acknowledge the assistance I have received from several people during this project. Daniel Huang has been extremely generous in allowing me access to his fireplace and bearing the risk of having molten metal in the room. Ben Myers has been a great help in scavenging materials around uni at night, and I can say he has a great eye for spotting aluminium.
|
|
The next day, I peered into the ceramic cup only to find slag deposits. Upon closer inspection, the cup had actually shattered into hundreds of pieces and I managed to find this lump of aluminium beneath the fireplace grate.
I could not believe my eyes! The heatsink had completely melted and dripped through the grate, forming this ... very "interesting" looking shape. This lump is what ignited my passion for smelting metals. I could not wait to start casting some more aluminium (albeit perhaps in a more aesthetically pleasing shape).
|

This random lump of aluminium was found underneath the fireplace grate
|

At work with the dodgy furnace
|
I knew the fireplace would do the trick, but I thought perhaps if a steel can was to trap most of the heat in...?
As you can see, this lead to the creation of a "Milo" furnace (if you can even call it a furnace) made from a Milo can and a tuyere hole at the bottom for pumping oxygen in. Of course, in all my eagerness to get started, I did not give a damn about what a real furnace needed:
Refractory? Nah no way, can't be bothered.
Blower? Umm... I'll use a hand pump.
Lid? I suppose the Milo can lid will do.
Crucible? Too lazy to find one. I'll use a smaller Milo can.
I call this the dodgy furnace...
|
|
Having almost no idea what I was doing, I loaded the base of the dodgy furnace with a bunch of charcoal bits and some scrap wood as kindling. With the help of the hand pump, I was able to get some pretty flames. The improvised crucible was loaded with scrap aluminium and dumped in. I then pumped away and hoped for the best...
|

The dodgy furnace spurting out a nice flame
|

The first ingot!
|
After about half an hour of pumping, the sides of the dodgy furnace were glowing red hot. So I decided to check on the aluminium. It seemed liquid enough, so it was poured onto this brick which I use as an ingot.
|
Here is the result of the first and final pour from the dodgy furnace. The brick has its brand engraved.. "Nubrik". However, there evidently wasn't enough aluminium to produce a full ingot. But I was quite amazed that such a dodgy furnace could melt anything...
The dodgy furnace was decomissioned after its first use because, upon later inspection, both the crucible and the furnace itself had massive holes in them from some serious oxidisation during the melt.
|

The yield from the dodgy furnace
|
|

Scrap aluminium ready to be pulverised then melted
|
After the spectacular failure of the dodgy furnace, I was now prepared to take a step back and design a proper one. However, having no materials on hand at the time meant that this was only feasible after returning home to the lab - a few months away.
In the meantime, I decided to muck around with the direct fireplace melting method again. Here is some scrap aluminium picked up from uni that will be melted in the next fireplace run.
|
I decided to stick to using a soup can as a crucible, mainly because there were plenty around and I wasn't expecting them to last more than one melt anyway.
Here the crucible is loaded with the aluminium scraps mentioned previously, dumped into the middle of some pretty hot coals, and left to suffer.
|

The scrap aluminium is heated in the fireplace
|
|

|
After about 20 minutes, the whole load is molten. Using a spoon attached on a long stick, the slag is skimmed off and the liquid aluminium is poured into brick ingot moulds, where they will solidify.
The tongs I am using were $1 from a charity shop. It feels quite durable and has a high temperature plastic handle. Score!
|
|
Immediately after pouring, the molten aluminium glows a cherry red and is extremely reflective. The surface becomes dull after a few minutes into cooling, and small crystals form shortly after.
I have to say, this pour was much more satisfying than the first!
|

The ingots are left to cool for half an hour before removal
|

Ingots
|
The result from subsequent melts - not bad. The ingots contain a lot of detail and are very smooth to the touch.
Some of the brick is chipping away due to the intense heat from the molten metal, but that doesn't matter. After all, these are only ingots.
|
|
Some further scavenging around the uni found some VERY nice scrap aluminium. These hollow bars were previously used to protect electrical cables from damage. A hacksaw turned the bars into usable chunks of metal.
|

Some awesome scrap aluminium
|
Pouring molten aluminium into ingots
|
Here is another melt using, once again, another soup can as a crucible and the latest aluminium scrap.
This is actually a still capture from a video that I have not yet uploaded. I might upload this in the near future when I can get it into a more usable format.
|
|
Here are the results of most of my melts in the fireplace - about 2kg worth of near pure aluminium. The two larger ingots at the bottom of the heap are the only "full" ingots - the ones that almost spilled over the side of the brick mould. The smaller one at the very top was the result of some excess aluminium in the crucible that had to be poured.
These ingots will travel back home with me to be remelted in the new furnace that will be built (details below).
|

A family of ingots - how beautiful!
|

A poor, battered, and decomissioned crucible
|
Just a shot to illustrate the poor condition of a soup can crucible after a single use. Prior to melting, I hammer in two holes on either side with a nail to accomodate for a crucible lifter (none other than a single bent coat hanger), and also a pouring spout.
Here you can see a hole in the side of the crucible with a bit of aluminium slag lodged in place. I have found some soup cans to be tougher than others. Of particular note are the ribbed cans that hold beef stew - these last about three melts. On the other hand, tuna cans proved to be extra dodgy, the one that I used developed a hole in it before the first pouring, leaking molten aluminium everywhere.
|