Well
everyone's seen it in the movies: the green images from
a pair of night vision goggles. The ability to see in
the dark has never been overrated in my opinion - just
think how useful would be, and how it would change the
way we work if we could.
There
are in fact two types of night vision devices... thermal
cameras and image intensifier devices. The latter is
what we shall explore here at Penguin's Lab!
|

An
exploded view of a generation II or higher night vision
tube
(Image courtesy of HowStuffWorks)
|
Gen |
Properties |
0 |
Needs separate source
of infrared lighting |
I |
Moderate range in moonlight |
II |
Moderate range in starlight |
III |
Moderate range in absolute
darkness |
IV |
Very long range in absolute
darkness |
Some properties of generation 0 - IV tubes
|
Image intensification
is the process of taking light that enters through
the objective lens and amplifying it tens of thousands
of times.
Image intensifier tubes
(or night vision tubes) are classified into different
generations. The earliest models are generation zero,
while the latest (at the time of writing) are generation
IV, which are currently only available in the military.
|
Generation
0 image intensifier
When
I first went around scrounging for an image intensifier,
anything better than a generation zero was stressful
to the wallet, so naturally I went for a generation
zero to see what it could do.
After
making up a small high voltage power supply (2000VAC)
to power it , shown here is the tube with a blue LED
torch to demonstrate that it works. |

Gen zero tube responding to
light input |

Gen zero tube mounted with
IR source |
Generation
zero tubes require a separate source of infrared light
(invisible to the human eye) in order to see anything.
For this,
I obtained 30 IR LEDs and hooked them up in an array
to form an IR beam. I integrated the night vision tube
and the IR illuminator into a custom case.
The top photo
shows the NV tube sealed in a plastic case, which is
mounted on top of the custom case, with the IR illuminator
board mounted on the front of the case. |
It
works! Quite well in fact. The range is very limited
though - about 20m. But hey, what do you expect from
something made in the 1970's.
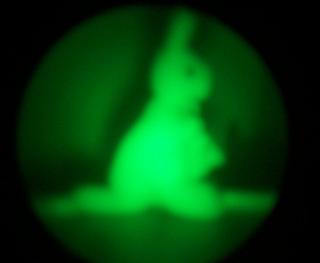
My
camera couldn't seem to focus on the screen, but nevertheless
this is clearly a toy kangaroo in the dark. |
|

|
The case
turned out to be really uncomfortable seeing as it was
rectangular.
After a bit
of brain racking, I decided to modify an old cordless
drill to accommodate the NV tube and power supply in
it. That way I could use the original drill battery
as the power supply.
|
The
top picture shows the new design. You can see the
objective lens poking out, and drill battery attached
on the bottom.
The
picture to the left is a view of the other side, with
a magnifying eyepiece mounted in front of the NV tube
screen.
|

|

|
Here's
a photo of our lounge room at night. I think the camera
is cooperating with me now. The outside lights are
on, which is why the window appears saturated.
All in
all, I don't think this tube was such a bad investment.
I imagine this device would be incredibly useful for
observation of night wildlife in conjunction with
a few IR torches.
|
Generation
I image intensifier
Eventually
I got sick and tired of the need to lug around an
IR illuminator every time I used the NVD, so I plucked
up the courage to acquire a generation I image intensifier.
The
night vision tube arrived quickly. The two flying
leads attached to it were not helpful, and it turns
out that the RED striped
cable was not the positive lead, and before I figured
this out I had wondered whether it was dead on arrival.
Upon
power-up, a beautiful green display appeared. Nice!
|

Gen I image intensifier tube
|

|
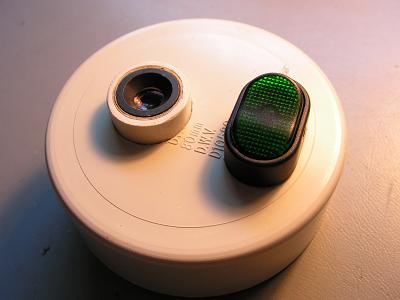
The
intensifier tube was mounted in a PVC tube with the
objective and eyepiece lens screwed onto holes which
were drilled into the PVC end caps.
The
objective lens is from my old generation zero setup,
which is screwed into a hole in the end cap which
was drilled a tad small then carefully expanded with
a round file. In hindsight it would have been nice
to use a thread tapper.
|
This is the eyepiece and
on/off switch. The eyepiece lens was actually salvaged
from an old scanner - it was mounted in front of the
scanner CCD as a focussing lens. Here I've wrapped
it in several layers of masking tape so that it fits
snugly inside a modified PVC adaptor tube.
|
|
|
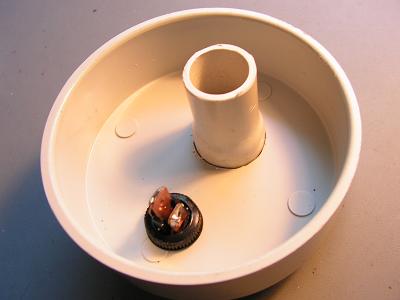
On
the other side of the cap, you can see the PVC tube
which houses the eyepiece, and the on/off switch contacts. |
I found that the length
of the original PVC tube was way too long, and the
eyepiece lens could not focus on the phosphor screen
from such a distance.
Cutting and filing the
main PVC tube to size was extremely important, as
one end had to be exactly the right distance from
the the eyepiece, and the other from the phosphor
screen on the intensifier tube.
|
|
|
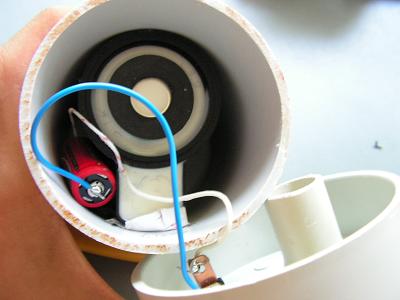
Here
is a look inside the almost completed night vision device.
A 3V CR123A lithium battery is connected permanently
using solder. The image intensifier draws only about
40 microamps, and so the battery should virtually last
forever. |
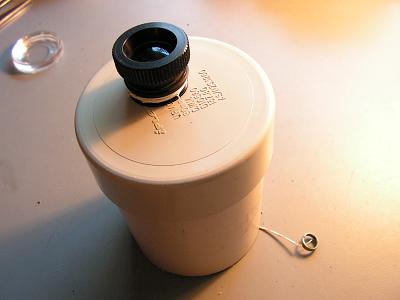
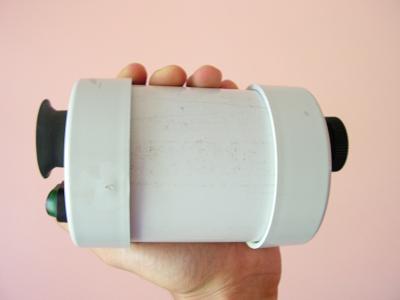
Last
step - a plastic eyepiece was placed over the eyepiece
tube. Perfect fit. Immediately the device looked a lot
more proffessional than a bunch of PVC scrap ends! |

|
The
completed Generation I night vision device! |
|
|
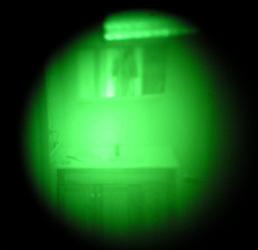
Well, the
camera was chucking a fit once again and wasn't able
to focus on the screen through the eyepiece. Just bear
in mind that in reality the intensified images are crystal
clear.
This is a
shot looking at a bathroom sink and cupboard. You can
see my reflection through the mirror on top. |